개발 => 복습 후 재정리 대기/Node.js
[Node.js] express HTTPS 설정 ( cerbot )
사전 준비
노드 서버 구축은 아래의 포스팅을 참조!
[AWS] Node.js, MongoBD 환경 구축
1. ec2 구매 - 구매 후 포트 설정 2. ec2 접속 - git bash 실행 sudo chmod 400 키페어 ssh -i 키페어 ubuntu@aws ip - Node 설치 curl -sL https://deb.nodesource.com/setup_14.x | sudo -E bash - sudo..
firstquarter.tistory.com
1. 배포된 Amazon EC2 Server
2. 도메인 등록 ( route53, gabia 등 )
3. 80번 포트 리다이렉팅
포트 포워딩 ( 80 -> 3000 )
sudo iptables -t nat -A PREROUTING -i eth0 -p tcp --dport 80 -j REDIRECT --to-port 3000현재 포트 포워딩 상태 확인
sudo iptables -t nat -L
4. pm2 설치
npm install -g pm2
인증서 설치
app.js 가 위치한 디렉토리로 이동!
// 인증서 설치
sudo apt-get install letsencrypt
// 폴더 생성
mkdir public
mkdir -p .well-known/acme-challenge
app.js (index.js 등등~?) 파일에 아래 코드 추가
( 서버 내에서 vi 편집기를 사용해도 좋고, 로컬에서 수정 후 git push -> 서버에서 git pull )
app.use(express.static('public'));pm2 서버 재시작
pm2 restart app.js인증 시작!
certbot certonly --webroot -w ./public -d firstquarter.shop(내 도메인)성공하면 아래 화면처럼~
EC2 서버 /etc/letsencrtpy/live 경로에 내 도메인 이름으로 폴더생성 + 폴더 내부에 인증서 생성!

HTTPS 포트 열어주기

인증서 적용
const fs = require('fs');
const http=require("http");
const https=require("https");

 const options = {
  ca: fs.readFileSync('/etc/letsencrypt/live/내 도메인 네임/fullchain.pem'),
  key: fs.readFileSync('/etc/letsencrypt/live/내 도메인 네임/privkey.pem'),
  cert: fs.readFileSync('/etc/letsencrypt/live/내 도메인 네임/cert.pem')
  };
  http.createServer(app).listen(3000);
  https.createServer(options, app).listen(443);
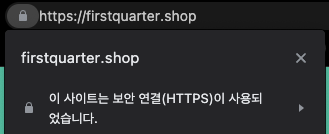
새로 접속할 때, HTTPS://내 도메인 네임으로 접속!
'개발 => 복습 후 재정리 대기 > Node.js' 카테고리의 다른 글
| [Jenkins] Node.js - Jenkins - Slack 연동 (0) | 2021.08.16 |
|---|---|
| [node-schedule][cron] 특정 시간에 동작하기 (0) | 2021.08.09 |
| 작성중... [Node.js] Swagger 설치, 적용 (0) | 2021.07.16 |
| [Node.js] AWS - MySQL 설치 (0) | 2021.07.02 |
| [Node.js][Express] 기본 틀 공부중 (5) | 2021.05.25 |
댓글